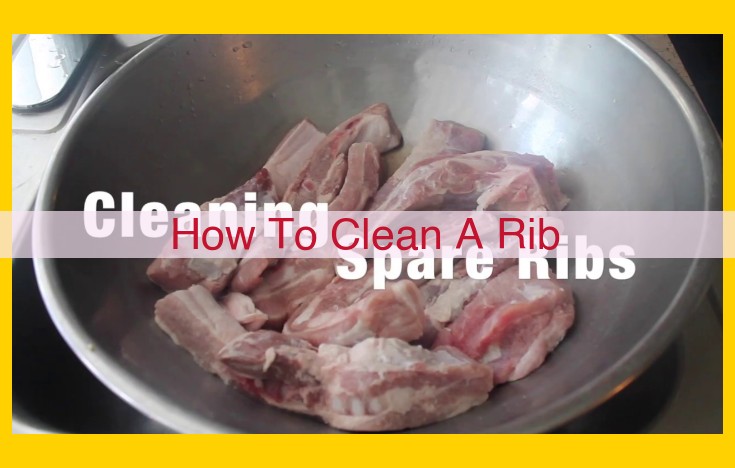
To clean a rib, you will need a sharp knife, cold water, salt, paper towels, and a cutting board. Rinse the rib and pat it dry with paper towels. Remove any excess fat or membranes. Trim the bones as desired. Cut the rib into portions or individual ribs for cooking.
Sharp knife for precise cuts
Mastering Meat Preparation: Essential Tools and Techniques
1. Essential Tools and Materials for Meat Preparation
In the realm of culinary arts, meat preparation is an art form that demands precision and attention to detail. To achieve mouthwatering results, gather your essential tools:
-
Sharp Knife: A sharp knife is a chef’s best friend, enabling precise cuts that preserve the integrity of the meat.
-
Cold Water: Maintaining the meat’s temperature at a low cold level is crucial for preserving its quality and preventing spoilage.
-
Salt: Salt draws out excess moisture, enhancing flavor and creating a dry surface for the perfect sear.
-
Paper Towels: These humble companions absorb excess moisture and inhibit bacterial growth, ensuring a safe and sanitary preparation.
-
Cutting Board: A stable and hygienic cutting board provides a secure surface for all your meat preparation tasks.
Cold Water: The Key to Maintaining Meat Quality
Meat is a perishable food that can easily go bad if not handled properly. One of the most important things you can do to preserve the quality of meat is to keep it cold.
Cold water helps to keep meat cold by slowing down the growth of bacteria. Bacteria thrive in warm, moist environments, so keeping meat in cold water helps to create an environment that is less conducive to bacterial growth.
In addition to slowing down the growth of bacteria, *cold water also helps to remove blood and other contaminants from meat. This makes the meat safer to eat and improves its flavor.
To keep meat cold in water, simply place it in a clean container filled with cold water. Cover the container and refrigerate it for up to 24 hours.
Here are some additional tips for keeping meat cold in water:
- Use clean water. Dirty water can contaminate the meat.
- Cover the container. This will help to keep the meat cold and prevent it from absorbing odors from other foods in the refrigerator.
- Refrigerate the meat for up to 24 hours. Meat can be kept in cold water for up to 24 hours. After 24 hours, the meat should be cooked or frozen.
Salt: The Magic Ingredient for Enhancing Meat
Salt: A Culinary Treasure
Throughout history, salt has been a culinary treasure, not only for its ability to preserve food but also for its transformative powers on flavor. When it comes to meat preparation, salt plays a dual role: enhancing flavor and drying the surface.
One of salt’s primary contributions is its ability to draw out the natural flavors of meat. By gently massaging salt into the meat’s surface, you allow it to penetrate deep into the fibers and interact with the proteins. This interaction brings out the intrinsic tastes and aromas that make meat so delectable.
Salt’s Drying Powers
In addition to its flavor-enhancing properties, salt also possesses the ability to dry the surface of meat. When applied to the exterior of the meat, salt absorbs moisture, creating a slightly dehydrated layer. This process helps in two ways:
- Prevents bacterial growth: Moisture provides a breeding ground for bacteria, which can compromise the safety of the meat. By drying the surface, salt inhibits bacterial growth, ensuring the meat remains fresh and wholesome.
- Improves searing: A dry surface allows for more even and efficient searing, resulting in a beautifully caramelized crust that locks in the meat’s juices and intensifies its flavor.
Tips for Using Salt
When using salt for meat preparation, remember the following tips:
- Use kosher salt: Kosher salt has larger crystals that dissolve more slowly, providing better control over the seasoning.
- Sprinkle evenly: Salt the meat generously and evenly to ensure all surfaces are covered.
- Allow time for absorption: Allow the salt to penetrate the meat for at least 30 minutes before cooking. This will give it ample time to enhance the flavor and dry the surface.
- Don’t overdo it: While salt is essential, too much can overwhelm the meat’s natural flavors. Start with a moderate amount and adjust as needed.
Salt is not just a seasoning but a powerful tool for transforming the flavor and texture of meat. By understanding its properties and using it wisely, you can elevate your meat preparations to new heights, creating dishes that tantalize the taste buds and leave a lasting impression.
Essential Tools and Materials for Meat Preparation
Paper Towels: Essential for Absorbing Moisture and Preventing Bacteria
In the culinary symphony where meat takes center stage, the humble paper towel plays an indispensable role. These unassuming sheets are the unsung heroes of meat preparation, safeguarding against the perils of moisture and bacteria.
Microbial mischief thrives in a moist environment, but paper towels act as valiant warriors against these microscopic invaders. By absorbing excess surface moisture, they create a dry and inhospitable terrain for bacteria to flourish. This not only enhances the meat’s flavor but also ensures its safety for consumption.
Excess moisture can also inhibit the effectiveness of seasonings and marinades, hindering the development of those tantalizing flavors we so eagerly seek. By mopping up the surface moisture, paper towels allow seasonings to penetrate deeply, infusing the meat with a symphony of savory notes.
In conclusion, paper towels are not merely disposable tools but essential allies in the art of meat preparation. Their absorbent powers combat moisture and bacteria, paving the way for a delectable and wholesome culinary masterpiece.
Cutting Board: A Foundation for Culinary Precision
In the realm of meat preparation, a sturdy cutting board plays a pivotal role, providing a stable and hygienic surface for precise cuts and manipulations. Its presence ensures food safety and enhances the overall experience of cooking.
A well-crafted cutting board offers a non-slip base, preventing it from wobbling or sliding during use. This stability allows for controlled and precise cuts, reducing the risk of accidents or uneven slicing. The non-porous surface of a food-grade cutting board inhibits the growth of bacteria, ensuring that your meat remains clean and free of contamination.
Choosing the Right Cutting Board
Selecting the right cutting board depends on your specific needs and preferences.
-
Plastic cutting boards are lightweight, durable, and easy to clean. They are a popular choice for home cooks due to their affordability and versatility. However, plastic cutting boards may retain knife marks and harbor bacteria over time.
-
Wooden cutting boards are highly durable, providing a traditional and stylish addition to your kitchen. They offer a natural antibacterial quality due to their antimicrobial properties. However, wooden cutting boards require regular maintenance to prevent cracking and warping.
-
Bamboo cutting boards combine the strength of wood with the hygienic properties of plastic. They are naturally antibacterial and resistant to moisture, making them a low-maintenance option.
Regardless of the material, a cutting board should be large enough to accommodate the size of the meat being prepared. It should also be thick enough to prevent the knife from cutting through the board and damaging the countertop beneath.
Maintaining Your Cutting Board
Proper maintenance is essential to keep your cutting board in optimal condition and prevent the growth of bacteria.
- Clean your cutting board thoroughly after each use with hot soapy water and a sponge.
- Disinfect the cutting board regularly using a diluted bleach solution or a commercial cutting board cleaner.
- Avoid leaving food on the cutting board for extended periods, as this can provide a breeding ground for bacteria.
- Condition wooden cutting boards with mineral oil or beeswax periodically to prevent drying and cracking.
By following these guidelines, you can ensure that your cutting board remains a safe and reliable tool in your meat preparation arsenal. It will provide a consistent and hygienic surface, allowing you to execute precise cuts and prepare delicious, high-quality meals.
Trimming Fat: The Art of Enhancing Flavor and Texture
In the culinary world, understanding meat preparation is paramount for achieving tantalizing and satisfying dishes. Trimming fat is one of the essential techniques that can significantly elevate your meat dishes. By eliminating excess fat, you not only enhance the texture of your meat but also reduce calories.
Fat plays a crucial role in meat’s overall flavor and juiciness, but excessive amounts can lead to an unpalatable experience. Trimming fat allows you to control the fat content, ensuring a perfect balance of flavor and tenderness. For instance, removing the thick layer of fat from a pork shoulder will yield a more flavorful and leaner roast.
Beyond aesthetics and calorie reduction, trimming fat also prevents shrinkage during cooking. When fat melts, it can cause the meat to contract and lose its valuable juices. By removing excess fat before cooking, you preserve the meat’s moisture and avoid a dry, overcooked texture.
Remember, trimming fat is a delicate process that requires a sharp knife and a steady hand. It’s essential to avoid cutting into the meat itself and to remove only the fat that is clearly visible. With practice and patience, you’ll master this technique and unlock the full potential of your meat dishes.
Removing Membranes: Unlocking Tenderness in Your Meat
When it comes to preparing meat, removing membranes is crucial for achieving optimal tenderness. These tough, silvery layers cover certain cuts and can make the meat chewy and difficult to eat. Fortunately, removing them is a simple process that can make a world of difference to your culinary creations.
Imagine biting into a perfectly grilled steak and being met with an unexpected toughness. It’s a frustrating experience that can ruin an otherwise delicious meal. The culprit? Membranes. These connective tissue layers wrap around the meat, providing structure and support. While essential for the animal’s anatomy, they can hinder our enjoyment of the meat itself.
The key to unlocking tenderness is to remove these membranes. This can be done with a sharp knife, carefully sliding it between the membrane and the meat. The technique is similar to filleting a fish: insert the knife at a slight angle and gently work it under the membrane. With patience and precision, you’ll be able to remove the membrane in one clean piece, leaving behind a tender and succulent cut of meat.
Removing membranes is a simple yet effective way to improve the quality of your meat dishes. By taking the time to remove these tough layers, you can ensure that your steaks, roasts, and chops are tender and flavorful, providing a truly satisfying dining experience.
Cutting Bones: The Art of Precision and Technique
When it comes to meat preparation, mastering the art of cutting bones is paramount for both safety and achieving the desired culinary results. Whether you’re removing bones for grilling, roasting, or preparing a hearty bone-in stew, approaching this task with the right knowledge and technique can make all the difference.
Safety First
Before you start cutting bones, it’s imperative to prioritize safety. Always use a sharp knife that is well-maintained. A dull knife can easily slip and cause injury, so don’t compromise on this aspect. Additionally, use a stable cutting board to provide a firm surface for your work.
Finding the Sweet Spot
To remove bones effectively, you need to identify the natural seams or joints where they connect to the meat. This will guide you in making precise cuts that minimize tearing and preserve the integrity of the meat. Use your knife to carefully cut along these seams, applying gentle pressure to separate the bone from the flesh.
Shaping and Trimming
In certain cases, you may need to shape or trim the bones for specific purposes. For instance, when preparing spareribs, you might want to remove the cartilage and rib tips for a more uniform appearance. Use a sharp knife to carefully cut through the cartilage or connective tissues, ensuring not to damage the meat.
Additional Tips
- Use a wet towel to wipe the knife blade periodically to remove any bone fragments or meat juices. This will help maintain cleanliness and prevent the knife from becoming dull.
- If you encounter any bones that are difficult to cut, don’t force it. Instead, consult a professional butcher or use a specialized tool like a bone saw.
- Always dispose of bones safely and responsibly. Wrap them in newspaper or use a designated bone disposal container to prevent accidents and contamination.
Essential Tools and Materials for Meat Preparation
To embark on the culinary adventure of meat preparation, it’s imperative to equip yourself with the essential tools and materials. This includes a sharp knife for precise cuts, ensuring the meat retains its juices. Cold water helps maintain the meat’s quality and firmness. Salt not only enhances flavor but also draws out moisture, creating a dryer surface for optimal searing. Paper towels are your trusty allies in absorbing moisture and preventing bacteria from spoiling the meat. Finally, a sturdy cutting board provides a stable and hygienic platform for your meat-handling endeavors.
Core Meat Preparation Techniques
Mastering core meat preparation techniques is the foundation for culinary success. Trimming Fat: Removing excess fat not only improves the meat’s texture but also reduces calories. Removing Membranes: Tough membranes can hinder the meat’s tenderness, so carefully removing them is crucial. Cutting Bones: Using a sharp knife, you can safely remove or shape bones, ensuring your meat is prepared to perfection.
Specialty Ribs: Types and Preparation
When it comes to specialty ribs, the star of the show is undoubtedly Spareribs. These large, meaty ribs boast a high bone-to-meat ratio, offering a satisfying chew with every bite.
Spareribs Preparation
To prepare spareribs like a pro, follow these steps:
- Remove the Membrane: Using a sharp knife, carefully slide it under the membrane covering the bone side of the ribs and gently peel it off.
- Trim Excess Fat: Trim away any excess fat from the surface of the ribs to enhance texture and reduce calories.
- Season Liberally: Generously season both sides of the ribs with salt, pepper, and your favorite spices.
- Smoke or Grill: You can either smoke or grill the spareribs to your desired doneness. For smoking, aim for an internal temperature of 180-190°F (82-88°C); for grilling, cook until the ribs are slightly charred and the meat pulls away from the bone easily.
By following these tips and techniques, you’ll elevate your meat preparation skills and impress your taste buds with mouthwatering dishes.
Essential Tips for Preparing Baby Back Ribs
In the world of barbecue, few dishes evoke as much tantalizing anticipation as baby back ribs. These delectable cuts, renowned for their tenderness and rich flavor, hold a special place in the hearts of meat enthusiasts. To elevate your grilling game and create ribs that will leave your taste buds singing, it’s imperative to master the art of their preparation.
Before embarking on this culinary adventure, gather the essential tools: a sharp knife, cold water, salt, paper towels, and a sturdy cutting board. With these companions in hand, you’re ready to tackle the core techniques of rib preparation.
Trimming the Fat
Excess fat can compromise the texture of your ribs, rendering them chewy and detracting from their delectable flavor. To avoid this culinary pitfall, trim away any visible fat. This meticulous process ensures that your ribs will be not only more tender but also healthier.
Removing Membranes
Beneath the layer of fat lies a thin membrane that, if left intact, can prevent the ribs from absorbing the full symphony of flavors from your marinade or rub. To unleash the ribs’ true potential, remove this membrane by gently slipping a knife underneath and peeling it away.
Mastering the Bone Cut
To achieve the ideal shape and tenderness in your baby back ribs, it’s essential to master the art of cutting between the bones. This technique involves carefully slicing along the natural seam between each rib, creating individual portions that are easy to handle and cook evenly.
Once you’ve mastered these fundamental techniques, you’re ready to embark on the delightful journey of creating your own culinary masterpiece. Join us in the kitchen as we explore the diverse world of ribs, delving into their unique characteristics and providing you with insider tips that will elevate your grilling experience to new heights.
Saint Louis-style Ribs: The Art of Perfect Tenderness
When it comes to ribs, Saint Louis-style ribs stand out as the epitome of succulent tenderness and smoky flavor. Derived from baby back ribs, these ribs undergo a specialized preparation process that enhances their desirability.
The Trimming Process: A Journey to Perfection
The transformative journey begins with carefully trimming the baby back ribs. Cartilage and rib tips, the elements that hinder a uniform shape and hinder tenderness, are meticulously removed. This meticulous attention to detail creates a uniform rack of ribs, ensuring a consistent cooking experience and optimal flavor absorption.
Preparation for Culinary Excellence
As the trimmed ribs await their culinary destiny, they are coated with a tantalizing blend of seasonings that awaken their natural flavors. Salt and spices, carefully harmonized, work their magic, enhancing the ribs’ inherent taste while drawing out moisture to create a crisp, flavorful crust.
Grilling: The Ritual of Transformation
With the ribs adorned in their savory attire, they are entrusted to the fiery embrace of the grill. Over indirect heat, they embark on a slow and steady cooking process, the smoke gently infusing them with an irresistible aroma. The grill master patiently monitors the ribs, basking them in a tantalizing sauce that enriches their flavor with every application.
The Moment of Delight: A Culinary Triumph
As the final moments of cooking approach, the ribs emerge from the grill, ** glistening with a luscious glaze.** Their tender flesh succumbs effortlessly to the gentle pull of a fork, revealing a succulence that melts in the mouth. The symphony of flavors, from the smoky undertones to the sweet and savory notes of the glaze, creates an unforgettable culinary experience.
Saint Louis-style ribs, a masterpiece of culinary artistry, offer a tantalizing journey of flavors and textures. Their preparation is a testament to the dedication of grill masters who understand the intricacies of meat preparation and the pursuit of culinary perfection. Indulge in the exquisite taste of Saint Louis-style ribs, a gastronomic delight that will captivate your taste buds and leave you craving for more.
