To masterfully grill a ham on a gas grill, gather essential equipment and ingredients like a ham, grilling brush, and marinade or glaze. Prepare the ham by scoring the surface and trimming any excess fat. Position the grill to indirect grilling and insert a meat thermometer into the center. Brush the ham with marinade and grill on low heat for several hours, basting occasionally. Finish with a glaze or sauce and continue grilling until it reaches an internal temperature of 145°F. Let rest before carving and savor the juicy, flavorful ham.
The Art of Grilling a Ham: A Culinary Symphony on Your Grill
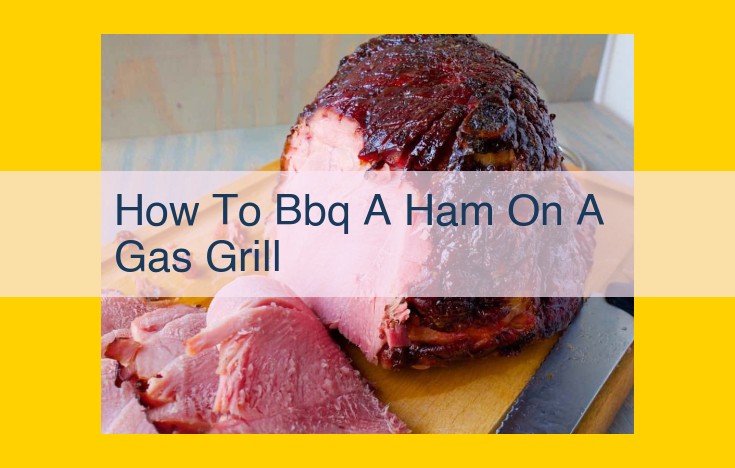
Indulge in the mouthwatering aroma and sizzling delight of grilling a ham, an art that elevates your summer gatherings to culinary masterpieces. Grilling ham not only imparts a smoky essence but also ensures its tender and flavorful goodness, leaving an unforgettable impression on your taste buds and the hearts of your loved ones.
Prepare to embark on a gastronomic adventure as we unveil the secrets and techniques of grilling ham to perfection. Gather your essential equipment, select the finest ham, and fire up your grill for an unforgettable grilling experience. Let’s explore the art of grilling a ham, one step at a time, and create a masterpiece on your grill.
Essential Equipment and Ingredients for Grilling a Ham:
Grilling a succulent ham is an art form that requires the right tools and ingredients. Preparation is paramount to ensure a flavorful and tender result. Here’s a comprehensive list of the crucial equipment and ingredients you need for a successful grilling experience:
Equipment:
- Grill: A gas or charcoal grill with ample cooking space for a whole ham.
- Thermometer: An instant-read thermometer or probe thermometer is essential for monitoring the ham’s internal temperature.
- Roasting Pan: A heavy-duty roasting pan or disposable aluminum pan to catch any drippings.
- Foil: Aluminum foil for wrapping the ham during grilling to prevent it from drying out.
- Basting Brush: A silicone or natural-bristle brush for applying glazes and basting liquids.
Ingredients:
- Ham: Choose a bone-in ham for maximum flavor. Remove the packaging and discard any excess moisture.
- Sweetener: Brown sugar, honey, or maple syrup to create a sweet glaze.
- Spices: Ground mustard, garlic powder, onion powder, and thyme add depth of flavor.
- Fruit Juices: Orange juice or apple juice provide moisture and a hint of sweetness.
- Vinegar: Apple cider vinegar or white vinegar balances the sweetness of the glaze.
Pre-Grilling Preparations: Setting the Stage for a Perfect Ham
Before the sizzle and the tantalizing aromas fill the air, it’s time to embark on the crucial pre-grilling preparations that will elevate your ham to greatness. Let’s dive into each aspect to ensure a flawless grilling experience.
Selecting the Ideal Ham:
The foundation of a delectable grilled ham lies in the quality of the meat. Opt for a bone-in ham as it retains moisture and flavor better during grilling. Consider the size of your gathering and choose a ham that will provide ample portions without excess.
Preparing the Ham:
Once you have your perfect ham, it’s time to prepare it for the grilling process. Remove the packaging and make sure to trim any excess fat. Use a sharp knife to score the fat surface in a diamond pattern. This will help the flavors penetrate the meat and render the fat evenly.
Setting Up the Grill:
As the saying goes, “A well-prepared grill makes all the difference.” Choose a grill that is large enough to accommodate the ham. Set up the grill for indirect grilling, creating a cooking zone on one side and a cooler zone on the other. This technique ensures even cooking without burning the exterior.
Grilling Techniques: The Magic Behind a Masterful Grilled Ham
When it comes to grilling ham, the techniques employed can elevate the experience from ordinary to extraordinary. Let’s dive into the arsenal of techniques that will transform your grilled ham masterpiece:
Indirect Grilling: The Path to Slow-Cooked Perfection
Embrace the art of indirect grilling, where the heat source isn’t directly beneath the ham. This nurturing heat allows the juices to circulate, resulting in a tender, succulent ham that melts in your mouth.
Basting: A Symphony of Flavor
Basting is a ritual that awakens the flavors of your ham. Brush or spray the surface with mouthwatering sauces or marinades throughout the grilling process. This infusion of flavors creates a symphony on your palate, making each bite a moment to savor.
Glazing: A Shimmering Masterpiece
A glaze acts as a protective shield, sealing in the ham’s juices while adding an irresistible sheen. Apply a generous layer of glaze towards the end of grilling, allowing it to caramelize and radiate with sweetness and savory notes.
Resting: The Grand Finale
After the heat of the grill, allow your ham to rest. This pause gives the juices time to redistribute, ensuring an evenly cooked and moist ham that will melt in your mouth with every bite.
Step-by-Step Grilling Instructions: The Journey to a Perfectly Grilled Ham
Embarking on the culinary adventure of grilling ham is a journey filled with tantalizing aromas and mouthwatering flavors. Let’s dive into the step-by-step grilling instructions to guide you through the process, ensuring a masterpiece on your grill:
-
Prepare the grill: Ignite the flames of your grill or set your gas grill to medium-low heat. Arrange your coals or lava rocks in a two-zone fire, creating a hot and a cool zone.
-
Position the ham: Place the ham on the indirect heat zone of the grill, ensuring it is not directly over the flames. This will prevent burning or overcooking.
-
Monitor the internal temperature: Insert a meat thermometer into the thickest part of the ham, avoiding the bone. The ideal internal temperature for a grilled ham is 140°F (60°C).
-
Brush with glaze or sauce: Halfway through the grilling time, brush the ham generously with your favorite glaze or sauce. This will add flavor and moisture.
-
Basting: Every 20-30 minutes, baste the ham with the juices that have accumulated in the pan below. This helps to keep the ham moist and prevents drying out.
-
Grilling time: The grilling time will vary depending on the size and thickness of the ham. As a general guideline, allow 15-20 minutes per pound.
-
Rest before carving: Once the ham reaches the desired internal temperature, remove it from the grill and let it rest for 15-30 minutes before carving. This allows the juices to redistribute, resulting in a tender and juicy ham.
Additional Tips and Flavors: Elevate Your Grilled Ham
Discover Harmony in Flavors
Grilling a ham can be a culinary adventure, where subtle combinations of fruits and spices ignite a symphony of flavors on your taste buds. Enhance the natural sweetness of ham with the vibrant acidity of citrus fruits, such as oranges or pineapples. Their tangy juices will create a delectable glaze that caramelizes on the grill.
Embrace the Embrace of Herbs
Fresh and aromatic herbs bring a vibrant touch to grilled ham. Rosemary, with its earthy notes, pairs wonderfully with the rich flavor of ham. Thyme offers a delicate balance of earthy and floral nuances. Scatter these herbs over the ham or rub them into the glaze for an infusion of freshness.
A Symphony of Spices
Spices can transform grilled ham into an exotic culinary experience. Introduce warmth and depth with cumin or coriander. Add a hint of smokiness with paprika or cayenne pepper. Experiment with different combinations to create a flavor profile that suits your palate.
The Magic of Marination
Marination is a technique that can infuse ham with an array of flavors. Create a flavorful marinade by combining fruits, herbs, spices, and a touch of acidity. Marinate the ham for several hours or overnight to allow the flavors to permeate every bite. This simple step will elevate the taste of your grilled ham to new heights.
Glazing: The Finishing Touch
A glaze not only adds a glossy sheen to grilled ham but also intensifies its sweetness and flavor. Combine your favorite fruits, herbs, and spices with a touch of honey or maple syrup to create a luscious glaze. Brush it over the ham during the last 30 minutes of grilling, and watch as it caramelizes and transforms your ham into a culinary masterpiece.
Carving and Serving the Ham: A Culinary Masterpiece
As the tantalizing aroma of grilled ham fills the air, the moment of truth arrives: carving and serving your culinary masterpiece. This delicate task requires precision and finesse to ensure that every slice is a testament to your grilling prowess.
Begin by placing the ham on a sturdy cutting board. Using a sharp carving knife, make a shallow cut along the bone, starting from the top and working your way down. Gently release the slices by cutting parallel to the bone, creating even and succulent slices.
To enhance the presentation, arrange the slices on a serving platter. Garnish with fresh herbs, such as thyme or rosemary, to add a touch of elegance and an extra burst of flavor.
When serving, allow guests to customize their portions by offering a variety of condiments. Mustard, honey, and a sweet and tangy glaze are all popular choices that can complement the rich and smoky taste of grilled ham.
Tips for Carving Perfection:
- Use a sharp knife: A dull knife will tear the meat, resulting in uneven slices.
- Carve against the grain: Cutting against the grain results in more tender and flavorful slices.
- Don’t overslice: Cut the ham into slices of about 1/4-inch thickness to ensure a satisfying bite.
- Serve immediately: Grilled ham is best enjoyed hot off the grill to savor its full flavor and juiciness.
Presentation and Garnish:
- Place the ham slices on a platter that contrasts with the color of the ham. For example, a white platter for a dark ham or a black platter for a lighter ham.
- Garnish with fresh herbs such as parsley, rosemary, or thyme. Herbs not only enhance the flavor but also add a touch of color and aroma.
- Consider adding a drizzle of olive oil or balsamic reduction to enhance the presentation and add a touch of sophistication.
