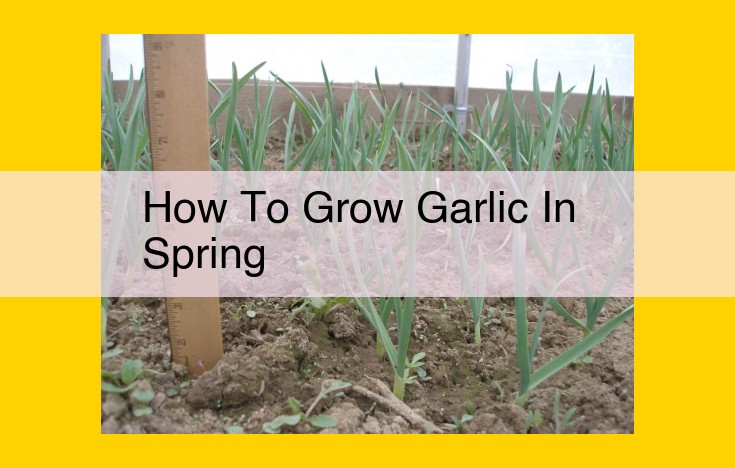
In spring, grow garlic by preparing well-drained soil in full sun and enriching it with organic matter. Plant individual garlic cloves or sets 6-8 inches apart and 2-3 inches deep, pointy end up. Water regularly, keeping the soil moist but not soggy. Mulch around the plants to suppress weeds and retain moisture. Rotate garlic annually to prevent disease.
Describe the necessary components for successful garlic cultivation, including garlic bulbs, cloves, sets, well-drained soil, loose soil, optimal pH, full sun exposure, and cool temperatures.
Essential Elements for Garlic Cultivation
To embark on the rewarding journey of garlic cultivation, it’s imperative to equip yourself with an understanding of the fundamental components that lay the groundwork for success.
Foremost among these essentials are garlic bulbs, the starting point for your garlic-growing adventure. These bulbs consist of individual cloves, which are the individual planting units. Alternatively, you can opt for sets, which are small bulbs composed of several cloves enclosed within a papery covering.
Beyond the choice of bulbs or cloves, the soil in which your garlic will reside plays a vital role. Well-drained soil is crucial to prevent waterlogging, which can lead to root rot. The soil should also be loose and well-aerated, allowing for proper root development and nutrient absorption.
Ideal Soil Conditions
The pH level of the soil should fall within a neutral range of 6.5 to 7.0. This pH range provides an optimal environment for garlic growth. Additionally, full sun exposure is essential for garlic plants to thrive, as it stimulates photosynthesis and bulb development.
Cool Temperatures
Garlic plants prefer cool temperatures, with optimal growth occurring in temperatures between 50°F and 70°F. Prolonged exposure to temperatures above 80°F can lead to stunted growth and premature bolting, where the plant sends up a flower stalk instead of producing bulbs.
Prepare the Soil for Optimal Garlic Growth
As you embark on your garlic-growing journey, the first crucial step is to provide a nurturing environment for your plants. This begins with preparing the soil. Imagine a luxurious bed that pampers your garlic with the nutrients it craves, setting the stage for a bountiful harvest.
To create this haven, begin by enriching the soil with an organic amendment like compost or manure. These treasures add a wealth of nutrients and improve drainage, allowing your garlic to thrive.
Compost, a gardener’s gold, is a magical concoction of decomposed organic matter. It teems with beneficial microorganisms that break down nutrients into a form that garlic plants can readily absorb. Moreover, compost improves soil structure, making it fluffy and airy, providing the perfect conditions for root growth.
Manure, another gardening gem, is a natural fertilizer that enriches the soil with nitrogen, phosphorus, and potassium, the essential macronutrients for garlic cultivation. It also improves soil water retention, ensuring that your plants receive the hydration they need.
To incorporate these soil amendments, spread a generous layer of compost or manure over the planting area and work it into the soil to a depth of at least 12 inches. This will create a fertile bed that will nourish your garlic plants throughout their growing cycle. Remember, healthy soil equals healthy garlic!
Planting Garlic: Setting the Stage for Success
When embarking on the journey of garlic cultivation, selecting the right variety is crucial. Choose varieties that thrive in your local climate. You can opt for cloves or sets—cloves are individual segments of a garlic bulb, while sets are small bulbs with a pointy tip.
Preparing the soil is the foundation for garlic success. Amend it with compost or manure to create a loose and well-drained environment. Garlic thrives in slightly acidic to neutral soil, with a pH between 6.0 and 7.0.
Now comes the moment of planting. Cloves are the most common option. Separate them from the bulb gently, ensuring they have at least one inch of the stem intact. Plant the cloves pointy side up, about 6 inches apart. Sets, on the other hand, should be planted a little deeper, about 8 inches apart. To determine the planting depth, measure from the bottom of the clove or set to the soil surface.
Spacing is vital. Adequate room for growth prevents overcrowding and promotes healthy, bulbous development. Leave about 12 inches between rows.
With proper planting techniques, you’ve laid the groundwork for a bountiful garlic harvest.
Watering Garlic: Striking the Delicate Balance
In the realm of gardening, watering is an art, not a science. For garlic, this art becomes even more delicate, as these bulbs thrive in moist soil, yet abhor waterlogged conditions. Understanding the proper watering technique will not only nourish your garlic plants but also prevent them from suffering from root rot and other water-related woes.
The Delicate Dance of Soil Moisture
Imagine your garlic plant as a thirsty traveler traversing a vast, sandy expanse. Just as the traveler needs a steady supply of water to quench their thirst, so too does your garlic crave regular watering. The soil should be moist, but not so wet that you could wring water out of it. Think of a sponge that has just been squeezed – damp but not dripping.
Avoid the Extremes
Overwatering is the nemesis of garlic plants. Waterlogging suffocates their roots, preventing them from absorbing oxygen and nutrients. This leads to stunted growth, yellowing leaves, and eventually, the demise of your garlic bulbs.
Underwatering, on the other hand, is equally detrimental. When garlic plants don’t receive enough moisture, they start to wilt, their leaves turn brown, and the bulbs become small and misshapen.
Finding the Sweet Spot
Determining the ideal watering frequency for garlic is like solving a riddle – it depends on several factors. Soil type, temperature, and rainfall all play a role. As a general rule of thumb, water your garlic twice a week during the growing season, or more often if the soil feels dry to the touch.
Mulching: The Masterful Gardener’s Ally
Mulching is a gardener’s secret weapon for maintaining optimal soil moisture. Spread a layer of organic matter, such as straw or wood chips, around your garlic plants. This mulch acts like a sponge, absorbing excess moisture during heavy rains and slowly releasing it into the soil when it’s needed. It also suppresses weeds, which compete with garlic plants for water and nutrients.
The Transformative Power of Water
Water is the elixir of life for garlic plants. With the right amount of watering, your garlic will thrive, its bulbs plump, its leaves vibrant, and its flavor rich. Embrace the delicate balance of soil moisture, and witness the transformation of your garlic into a culinary masterpiece.
Explain the benefits of mulching around garlic plants to suppress weeds and retain moisture.
Benefits of Mulching for Garlic Plants: A Garden Savior
When it comes to gardening, mulching stands as a hero, safeguarding your plants from harm and nurturing their growth. For garlic, this protective layer is especially crucial.
As a natural weed suppressant, mulch keeps these pesky competitors at bay, allowing garlic to thrive without hindrance (“Away with the weeds!”). Its water-retaining abilities work like a sponge, keeping the soil moist and preventing garlic from drying out (“Thirst not, my garlic!”).
Imagine your garlic plants basking in a cozy, weed-free haven, where they have all the water they need. Mulch acts as a protective shield against the elements, ensuring that your garlic harvest is bountiful and disease-free. (“Healthy and thriving, just as they should be!”).
So, let’s give our garlic plants the gift of mulch, the ultimate garden warrior that keeps weeds out and moisture in. Embrace the power of mulch, and watch your garlic flourish!
Discuss the need for crop rotation to prevent disease buildup.
Crop Rotation: A Vital Practice for Healthy Garlic
In the realm of gardening, crop rotation emerges as a crucial strategy to safeguard the well-being of our beloved garlic plants. By alternating the types of crops grown in a particular area over time, we can effectively thwart the buildup of disease-causing organisms that may otherwise wreak havoc on our garlic yields.
Imagine a garden bed where garlic has been grown year after year, its soil teeming with microscopic villains just waiting to pounce. Over time, these pathogens multiply and gather strength, turning the soil into a breeding ground for disease. But when we introduce crop rotation, we disrupt this sinister cycle.
By planting garlic after a different type of crop, such as tomatoes, peppers, or beans, we deny these soil-borne pathogens the opportunity to establish a foothold. The soil has a chance to rest and regenerate, while the garlic plants benefit from a fresh and invigorated environment.
In the long run, crop rotation contributes to healthier garlic bulbs, with reduced susceptibility to disease and improved overall yield. By embracing this simple yet profound practice, we empower our garlic plants to thrive and provide us with an abundant harvest of this delectable and versatile culinary and medicinal treasure.
Troubleshooting Common Issues in Garlic Cultivation
Garlic, a versatile and flavorful plant, is relatively easy to grow, but it’s not immune to occasional challenges. Here are some common issues you may encounter during garlic cultivation, along with practical solutions to overcome them:
Yellowing Leaves
Cause: Nutrient deficiency
Yellowing leaves in garlic plants often indicate a lack of nitrogen. To rectify this, apply a nitrogen-rich fertilizer to the soil.
Cause: Overwatering
Soaked soil can lead to root rot and nutrient deficiencies, resulting in yellowing leaves. Adjust your watering schedule to ensure the soil is moist but not waterlogged.
Pests
Aphids: These tiny insects feed on garlic sap, causing yellowing leaves and stunted growth. Treat with insecticidal soap or neem oil.
Thrips: These slender insects can also damage garlic plants, leading to silvery streaks on leaves. Use insecticidal soap or spinosad.
Stunted Growth
Cause: Poor soil conditions
Garlic prefers well-drained, loose soil. If your soil is compacted, amend it with compost or manure to improve drainage and aeration.
Cause: Planting too deeply
Garlic cloves should be planted just below the soil surface. Planting too deeply can inhibit root growth and stunt the plant.
Cause: Inadequate sunlight
Garlic requires full sun for optimal growth. If your plants are not receiving enough sunlight, consider transplanting them to a sunnier location.
By addressing these common issues promptly and effectively, you can ensure a bountiful harvest of healthy garlic bulbs. Remember, with proper care and attention, garlic is a hardy plant that will flourish in your garden.
Harvesting Garlic at Peak Maturity
The culmination of your garlic-growing journey arrives with the harvest. As the summer sun kisses the soil and the days get shorter, it’s time to pay attention to the telltale signs that your garlic is ready to be plucked from the earth.
Observing the Plant’s Cues:
As the garlic matures, the lower leaves will begin to yellow and dry out. This is a natural process as the plant sends its energy to bulb development. The 茎干 will also start to soften and bend, signaling that the bulbs are nearing maturity.
Gently Pulling and Checking:
Carefully pull up a few plants to inspect the bulbs. If the outer skin of the bulbs is dry and papery, and the cloves are plump and firm, then it’s time to harvest the entire crop.
Harvesting Tips:
- Use a garden fork to gently loosen the soil around the bulbs without damaging them.
- Lift the bulbs from the ground and gently shake off any excess soil.
- Cut the stems about an inch above the bulb.
- Avoid washing the garlic immediately, as moisture can promote spoilage. Allow them to air dry in a well-ventilated area for a few weeks.
Storing Garlic for Maximum Shelf Life
Once your luscious garlic bulbs are harvested, the journey to preserving their pungent goodness begins. Here’s a comprehensive guide to extending the shelf life of your garlic, ensuring it remains a flavorful addition to your culinary adventures.
Proper Curing:
Arrange the newly harvested bulbs in a well-ventilated area with low humidity. Allow them to cure for 2-4 weeks at a cool temperature (around 60-70°F). This process removes excess moisture and promotes skin hardening, essential for long-term storage.
Air Circulation and Temperature Control:
Garlic thrives in dry, well-ventilated environments. Keep your bulbs in a mesh bag, basket, or breathable container that allows air to circulate. Maintain a consistent temperature between 40-50°F. Avoid storing garlic in warm or humid areas, as it can accelerate spoilage.
Root and Stem Removal:
Trim the roots close to the base of the bulbs. Leave about 1/2 inch of stem attached. This prevents moisture loss and helps the garlic retain its flavor.
Darkness and Minimal Handling:
Garlic prefers darkness, as exposure to light accelerates sprouting. Store your bulbs in a dark, cool pantry, cellar, or basement. Avoid excessive handling as it can damage the skin and make the garlic more susceptible to decay.
Freezing and Drying Techniques (Optional):
For extended storage, you can freeze or dehydrate your garlic. Peel and mince the cloves before freezing them in airtight containers. To dehydrate, thread peeled cloves on a string and hang them in a warm, dry place. Once dried, store them in airtight jars.
By following these time-honored techniques, you can ensure your garlic remains flavorful and potent for months to come. Whether you’re using it to enhance your culinary creations or reaping its health benefits, having a well-preserved garlic stash is an invaluable asset in any kitchen.
Briefly discuss the various medicinal properties of garlic and how incorporating it into the diet can provide health benefits. (Optional, for a comprehensive guide)
Growing Garlic: A Step-by-Step Guide with Medicinal Insights
Embark on a culinary adventure as we explore the art of growing garlic, a versatile and nourishing ingredient that adds flavor to your dishes and boasts an array of health benefits.
Essential Elements for Garlic Cultivation
Like any thriving garden, garlic cultivation requires key ingredients. Ensure optimal growth by providing:
- Garlic bulbs, cloves, or sets: The foundation for your garlic garden
- Well-drained, loose soil: Allows for proper root development and drainage
- Optimal pH of 6.0-7.0: Creates a favorable environment for nutrient absorption
- Full sun exposure: Boosts plant growth and bulb formation
- Cool temperatures: Ideal climate for garlic, typically around 60-70°F
Preparation and Planting
Prepare the soil with rich compost or manure to nourish your garlic plants. Plant cloves or sets pointed end up at a depth of 2-3 inches. Space them 4-6 inches apart to allow for ample growth.
Care and Maintenance
Water your garlic plants regularly, aiming for moist but not waterlogged soil. Spread mulch around the plants to suppress weeds and retain moisture. Practice crop rotation to prevent disease buildup.
Troubleshooting Common Issues
If you encounter yellowing leaves, consider adjusting water and nutrient levels. Pests or stunted growth may require organic pest control measures or nutrient supplementation.
Harvesting and Storage
Harvest garlic bulbs when their tops turn brown and start to fall over. Dry them in a warm, well-ventilated area for several weeks. Store garlic in a cool, dark place to extend its shelf life.
Medicinal Uses of Garlic
Beyond its culinary delights, garlic possesses remarkable medicinal properties. Incorporating garlic into your diet has been shown to:
- Support immune function, reducing the risk of infections
- Lower blood pressure and cholesterol levels
- Inhibit inflammation, potentially reducing the risk of chronic diseases
- Act as an antioxidant, protecting cells from damage
Savor the benefits of this culinary and medicinal marvel by cultivating your own garlic. With a little care and attention, you’ll soon be harvesting fresh, flavorful, and health-promoting garlic from your garden.
